Pages - Menu

Wednesday 29 September 2010

3 Blogger Features Missing and Expected by Blogger Users

We all know that Blogger is becoming more smarter but not greater than WordPress. As comparison to WordPress, Blogger is a great blogging service although WordPress is paid self hosting service. But WordPress also provides free hosting and domains.


However, WordPress has all the features that the blogging platform must have. But Blogger users are still expecting some more new amazing features. Check out some cool features which is released by Blogger officially:

  1. Blogger Released new comments System
  2. Blogger Launched 'Share Button' Feature Officially
  3. Get your Complete Blog Stats in your Blogger Dashboard
  4. Blogger Posting Preview now in Main Page and Blogger New Video Player
  5. Blogger post preview before posting, now available!
  6. Blogger launched new Template Designer feature
Blogger is still working on new features that are mostly demanded by Blogger users. Now we will discuss about the features that is not launched but more expected by us. Lets see what is missing on Blogger BlogsSpot.

Commenting System
Blogger has enabled comment form below each post. Actually, the Blogger commenting system is not systematical. If you are WordPress user, then you might know that commenting system is quite well. In WordPress you can reply to all of the comments with the single click button. But in Blogger, we have to use "@" to recognized the person while replying to any comment.

So, Blogger must develop commenting system to make easy.

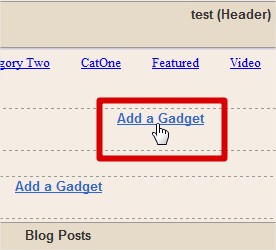
Widget and Plugins Directories
Blogger have many useful widgets which can be used easily. But blogger doesn't have widget directory where it can be searched and install with on click. If blogger release the separate widget directory, the users can view the widget works properly or not. And we will become free to use and don't have to waste time by searching widgets in Google.

It will be better if anyone can submit the blogger widget if they have any. Check out the Blogger widget created by me:
  1. Adsense Revenue Sharing Widget For Blogger Blogs
  2. Stylish JQuery Featured Post Widget for Blogger
  3. Recent Post Widget for Blogger Using Google API
  4. Fast Loading Recent Posts Widget for Blogger
  5. Placement of Ads or Widgets below the post title in Blogger
Surely, I will submit all of my widgets to the directory if Blogger release it.

PHP with HTML Templates
In all of the Blogger Templates, we can only use HTML and CSS code. What if you can use PHP with HTML and CSS on Blogger Template? No doubt, it will become awesome. In this situation, WordPress users also can get benefits because the Blogger Template will no more remain in XML format.

You know PHP is most developed computer language. Many awesome things can be created with the help of PHP. So, we can't say it is not possible to bring PHP with HTML in Blogger!

Conclusion
So, these are the essential blogger features which are in imagination. If Blogger fulfill these features, it will beat WordPress and gets more and more users that they might not expected!

No doubt if these features enable in Blogger, WordPress users returns again to BlogSpot platform because Blogger is absolutely free blogging platform provided by Google team.

In your opinion, what is the feature that you want to see in future on Blogger?

View This Article / Download>>

Tuesday 28 September 2010

10 Great WordPress Business Blog Themes

This is a guest post contributed by James Adams.

WordPress makes creating a web presence easier and more economical than purchasing design time from a web professional. Thousands of templates are available, each one customizable to your needs. Your website needs to be easy to use and navigate as well as present your company's material in the best possible light. There is a vast array of WordPress themes (templates) which can do this for you.
Recently we created 3 WordPress converted Blogger Template which includes as below:
Now here are ten WordPress themes designed to make your business shine.

1. Movement [$32]


The Movement theme from Themeforest offers a unique slider, 7 layouts and 6 different styles. There are five customizable widget panels, perfect for your company's portfolio. More options are available through the dashboard. This dynamic theme can display maps, hold subscription forms and highlight your company's recent work.

2. Gen20XX [$27]


You can have different sidebars for each page using the Gen20XX theme. Possesses a Lightbox Portfolio gallery, letting you keep all of your pictures in one place. There are five color schemes available, custom sliding panels and core templates for your home and contact page. There is a jQuery featured area which offers 25 effects.

3. Idea Business Blog Temp [$27]


Great scalability with its large picture area. You can add tooltips on the images and easily add navigation items. This theme comes sidebar and footer widgetized with its own built in custom widgets and is perfect for creating a shop or a services page, offering plenty of options.

4. Bitwork Portfolio and Business Theme [$27]


Comes with 8 pages templates, 5 color options and 12 sidebar positions. There is a contact form, multi-level menu and jQuery slider bar. Bitwork is perfect for businesses who have work they want to display thanks to the Lytebox feature, which lets you put custom pictures into your site easily and effectively.

5. Big Business [$27]


Six separate color themes come with the Big Business template. There are two different slider menus, a drop down menu and a portfolio page. A fade effect has been added for testimonial quotes. Each template comes with two headers and two homepages. Truly one of the most versatile WordPress business themes.

6. WP-Clear [$79]


Create your WordPress powered business website with a 2 or three column layout. The WP Clear theme offers drop down navigation, is SEO optimized and allows you to use a magazine format for your page. This smart theme provides space for banners and widgets. The author page is built in. There is also Gravatar integration for extra ease of use.

7. Minimaliste [$43]


As the theme name suggests, this is a minimalist theme which highlights your contents in grids. There is a featured category slider, options for your themes, and integrated blog pagination. This theme is very useful for posting pictures and your work portfolio.

8. Revival [$47]


Stylish and clean, the Revival theme is easy to navigate and fast to load. Two bottom bars, a custom menu system, and a post thumbnail function highlight this theme. If your company has a few products to sell, this theme will add emphasis to their design.

9. Elegant Estate [$39 for a theme package]


This theme is compatible with Opera, Netscape and Safari. Designed for the realtor community, the theme has widget ready sidebars and is advertisement ready. There are five color schemes and you can bring in custom thumbnail images. Choose to go with the blog or presentation style of site.

10. Akihabara [$37]


There are plenty of custom theme options with the versatile Akihabara theme. You can add footers, Google Analytics, banner ads and a custom logo. You can create five different sized columns and galleries and there is optional placement of up to eight banner ads on the blog. You can also easily showcase your best work, services and products on the homepage with the jQuery slider.

Also check out:
  1. Get $80 WordPress Premium Magazine Theme for Free By Commenting!
  2. New Premium WordPress Theme by Hacktutors - saaZine
New WordPress themes are hitting the market daily. Whether you are a designer or a shoe salesman, there is a WordPress theme for you.

View This Article / Download>>

Friday 24 September 2010

Releasing Flash News Blogger Template

Once again, I'm back with the new Blogger Template named Flash News. Flash News Blogger Template have 2 columns with the clean layouts and professional design. Flash News Blogger Template suits on any blog. It loads faster with comparison to other web templates. I made Flash News Blogger Template available for free for all blogger users!


View Live Demo


Times Downloaded


Main Features
Flash News Blogger Template has all the features that has been taken out through the official Blogger and Blogger resources. I converted it into Blogger Template, originally it is WordPress theme designed by WooThemes.

Stylish Menu Bar
JQuery Menu Bar

Th top Menu Bar is based on JQuery which is professional designed and with special hover effects.

Featured Post Widget

The Flash News Blogger Template contains featured post widget which is entirely different from other.

Automatic ReadMore with Image Thumbnails

Automatic read more makes easy to all of your viewers to view your post in summary with relevant image. Continue Reading link contains on the left side and the labels contains on the right side of the post .

Page Navigation

Instead of Older Post, Newer Post link there is a navigation which makes easy to scroll and jump within the page to page.

3 Footer Widgets

You can place the three or more widgets on the footer. So, you can have a maximum widget on this template.

Configurations
Lets fit it on your blog! Flash News is very easy to use.

Top Menus Configuration
Find the following code in your template and replace the URLs with your own:


Sub Menu Configurations
Find the following code in your template and replace with your own:


Featured Post Widget

In default, featured post widget may not appear. To make it work go to Design > Page Element. Click Add a Gadget just between "Blog Posts" and "Header" widget as shown below:


Then click HTML / JavaScript and add the following code in the box:


       https://blogger.googleusercontent.com/img/b/R29vZ2xl/AVvXsEgtMwxTZy24EZK1st9peivdc6n9G-fvsIikI7kLEDNZyydAMWIlGmKCJt-Z2iFGCxd5sQWCoeGMt4uqNPd6wyfHrD8bYZmxb4WGkMu_orHjVqqI8Hy4-_oit0uaDnsKQuX1TOEHnxB-ot6y/s1600/thumb.jpg" />


#">Title 1


Title1's short summary Goes Here


#">Continue reading...


You can place any image size, it automatically resizes and fits on the featured post widget. Here is the instruction how to customize featured post widget:

There is 3 content in this widget, replace each Blue color URL with your own Image URL.

Replace # with the post URL.

Replace the Green color text with the title of each featured post.

And replace Pink color text with the short summary of the each featured post.

Finally, save the widget!

Now, you are ready to use Flash News Blogger Template on your blog. I hope you loved this template. Your suggestions and feedback is highly appreciated!

Feel free to ask if there is any confusing and problems. I'm always ready to help you!

View This Article / Download>>

Tuesday 21 September 2010

What a Stupid Blogger Comments System

Earlier, Blogger released the New Comments System that has been most demanded by all blogger users. There were 2 main features, Automatic Spam detection and Viewing all comments in one page. But what I was expecting and what I got. Automatic Spam comment detection feature is totally useless for me.

Blogger's new Automatic Comment Detection feature is doing opposite work for me. Here, watch out one example:

Click on the image to Enlarge
Is there any spam on this comment? I think there is no spam. Even there is no spam, it goes in the spam box. Just  he was asking for the help!

I never notice the Spam box because I think there is only spam comments. But, the above example proofs that your spam box also may contains original comments but not a spam!

If the spam detection found the comment is like a spam, it directly goes to spam box. But now your genuine comments also can go into the spam box, be aware!

From now, also check the spam box there must contains genuine comments that you might not notice. If the comment is original and not a spam, check the comment and click Not Spam button.

View This Article / Download>>

Hosting and Launching of Your Website

Guest post by Buytemplates.net

In this globalizing world as a cheap and effective way of advertising one s products and companies the contribution of the web site can not be described in a word. For the blessing of cheap web hosting and other facilities it has been possible to ensure a world class internet. Web hosting service is that kind of service which makes oneself available in the internet. It also takes one’s web page visible in World Wide Web. Two kinds of web hosting are available.

Image Credit
One is free from coast when another is paid for web hosting services.
When it is used for personal purposes and not for a company it is free from coast. On the other hand if a company wants to consume the facilities served by the web hosting companies it is mandatory to pay the hosting companies. This payment can be given in a time interval or the consumer companies bound to advertise the advertisement and billboard of the hosting companies.

Nowadays free web hosting services are liked by all most. Besides these there are some limitations in free web hosting services. Limited disk space and limited data transfer can be remarked among the limitations. In that case paid web hosting services is perfect. But if the business is small and one does not want to spend more for web hosting free web hosting will be better option for him.

For the development of business, you must have a website of your business institution. That is one of the effective and cheap media for the marketing of your business. Hosting of the website is not expensive and sometimes that is fully free. But you can get great benefits through your website. Internet is the effective and cheap media for marketing and you shouldn’t overlook that service.

First, you have to make the website of your company or for other purposes. Website designing is not too tuff and sometimes they are too easy that you can simply design that spending 2 to 3 days in the internet. If your company is well reputed and you have enough money for making the website then you should consult the webmasters and use them for designing the website. The website should be suitable to serve your purposes at best.

After designing the website you have to host that in the reliable server and you must confirm the quality of the server and their services. You should choose the service provider who has honorable reputation in their service and senior in the market. You can compare the pricing of the service among other providers of the market because there are many companies those are familiar for web hosting service.

If you have knowledge on the server and the rules of hosting the website then you can login to the cpanel and upload the files of the website using the upload software like filezilla. If you are not skilled then you may take help from the expert administrator who has professional knowledge for hosting the website.

Buytemplates.net is a web products hub offering scores of inexpensive web templates and brochures. The site presents readymade website templates like Ebay Templates, Joomla templates, etc. and also does conversion of PSD2XHTML and many more along with an affordable template customization service.

View This Article / Download>>

Monday 13 September 2010

Adsense Revenue Sharing Widget For Blogger Blogs

You might have seen Adsense revenue sharing in many popular WordPress blogs. But you also loved to add revenue sharing widget on your blogger blog. Blogger support for multiple author as in WordPress. To share a love and receive many posts from other author, you can embed Revenue Sharing Widget on your Blogger BlogSpot blog!

Revenue Sharing Blogger Widget

Using this widget can help you if you have multiple authors or writers. Let the other author gets benefits while writing on your blog.


Why It is Important?

There may be separate Google Adsense account with each authors and writers of your blogger blog. In each post that they write, there appears Google ads of their own. So, your author can easily get benefits whenever they write on your blog. They will get more inspiration that they can earn more from your blog!

Lets see the tutorial how to add this widget on your blog.

Sign in to Blogger.com and Go to Design > Edit HTML.

Check the 'Expand widget Template' box.

Find the following code in your template:


Now, paste the following code just above


PASTE THE AD CODE OF Author_1 HERE


PASTE THE AD CODE OF Author_2 HERE


PASTE THE AD CODE OF Author_3 HERE


It may not work when you directly Copy/Paste the code from Adsense. Encode the adsense code from here. Make sure that you have place the right code as shown below:


Replace Replace the red color text with your author adsense code. And Replace blue color text with the NAME of the author (You've chosen the name when you register). The author names must not be different, it should be unique. Place the author name when they have chosen when they registered the blogger account.

It can be found on the profile editing page.


Finally, save your template. Now your writer can get fully monetized post!

Not only with Google Adsense even you can use this trick with other ad service if your author use it. It is your choice to choose the banner size. I recommend to place square banner. It is best visible on the blog posts.

Now your blog is Adsense Revenue Sharing Blog with multiple authors where each and every authors can get benefits whenever they write on your blog. Enjoy blogging with blogger!

Let me know if you have used this trick on your blog.

View This Article / Download>>

Sunday 12 September 2010

Increase your Link Visibility Using Web 2.0 Buttons

Now a days, Web 2.0 applications is being most popular to spice up the website with advanced new features. Web 2.0 applications is used to enhance the visibility of anything like Web templates, buttons, Icons and so on. Using Web 2.0 application, you can make your blog looks like professional and formal layouts.

Web 2.0 Buttons for Websites

I've been using the buttons provided by Google on my blog. Actually, we can call it as Web 2.0 buttons. Definitely, you may want to apply such professional looking buttons instead of undesirable links on your blog. Let see we can use the Web 2.0 buttons.

On Subscription Box

Watch on the top right sidebar of this blog, you'll see the subscribe button. Now, compare that subscribe button with your blog's subscription button. But the stupid Internet Explorer doesn't supports for curved buttons. So it may be undesirable view on Internet Explorer.


As Read More Button

Go to the Homepage of this blog. And watch for the Continue Reading button that you can see below each post. This one is click able. When you see that button you may intend to click it.

Have you noticed that each of the Blogger Template which I have made consist of read more link?

Older Post and Newer Post
Many Blogger blog users were having problem with page navigation links. Older post, Newer Post and Home links were not visible but fortunately , I solved that problem. You can see these button on each post of this blog.

These are the existing place where I used Web 2.0 buttons. But, you can use everywhere that you want.

Let see how you can use this on your blog. First off all, download CSS code from here and upload it on your server. Add the Link to CSS where you have uploaded. For example: /style.css" type="text/css"  /> 

Replace /style.css with the URL where you have hosted CSS code. Now, you are ready to use these button. Use this code to embed Web 2.0 buttons on your blog:


You found the complete information and tips from here.

Hope you've used such nice looking Web 2.0 buttons on your website and blog. Let me know if there is any obstacle and error while doing this process on your blog.

Share how do you like these Web 2.0 buttons? Have you used this on your blog?

View This Article / Download>>

Saturday 11 September 2010

Free 1 Year Domain Registration and Monthly Hosting $10 Off

If you are planning to start a new blog with reliable web hosting, then this is the great offer for you. I've created the new promo code with Dream Host. Dream Host provides you really reliable web hosting service with lots of advanced features. I'm sure you 'll found a great difference than other web hosting services.

Free Domain Registration and Save $45 Using Promo codes on Dream Host

Read: 8 Recommended Affiliate Programs to Make Money Online

Start a new plan on Dream Host and get a heavy discounts. If you have already planned to start a new blog with Dream Host then you are ready to get discounts.

What you can get?

1 Year Free Domain Registration cost of $15 (Any domain name)
$10 off in Monthly Hosting Plan
$20 off in Yearly Hosting Plan
$30 off in 2 Years Hosting Plan

It means you can save $45 if you have planned your blog for 2 years hosting with any new domain name!

How to get Discounts

You have to Sign up for Dream Host. Note: Don't choose the web hosting plan for more than 2 Years. Other wise you'll not get discounts.

Watch out, when you see this screen,

Click to Enlarge
Insert the promo code as NEWHACKTUTORS on "Promotional code or email address that referred you" form (See the above image).

Make sure that you have written right information which is important in future. You'll redirected another page and you'll see this form.

Click to Enlarge
Also make sure that you have got the Free additional Domain registration and Promo code Credit (See the above image). Insert your credit card information and click Continue Button.

Finally you've got $10 monthly $20 Yearly and $30 for 2 Years web hosting and 1 Years free Domain registration! And you saved $45 for 2 years hosting with free domain name.

Once again, the Coupon code is NEWHACKTUTORS

Enjoy the free domain registration and web hosting. Let me know if you have registered with this process on Dream Host.

View This Article / Download>>

Stylish JQuery Featured Post Widget for Blogger

Featured Post widget is important to add the most interesting content of your blog. By adding featured post widget, you can emphasize the most popular content and show it to your readers. You may have seen these kinds of widget in similar WordPress blogs.


Today, we'll learn how to add it into Blogpsot Blogs. Earlier, I created Platinum Blogger Template. From the most of the template users, I received the comments that Featured Post widget is not present there. So considering this, I am writing the separate tutorial which we will start now!

First of all view the Demo here.

Note: Platinum Blogger Template users don't have to follow the Step1, Step2, Step3, Step4 and Step5. So you can directly jump to Step 6.

Updated: All code has been updated. Please re follow the instructions those who have installed this widget.

Step 1. As general, Log on to your Blogger account and go to Design > Edit HTML.

Step 2. Find the following code in your Template:

]]>
Step 3. Just above  ]]> tag, add the following CSS codes:

#featured{
width:336px;
padding-right:250px;
position:relative;
height:250px;
background:#fff;
border:5px solid #ccc;
}
#featured ul.ui-tabs-nav{
    position:absolute;
    top:0; left:336px;
    list-style:none;
    padding:0; margin:0;
    width:250px;
}
#featured ul.ui-tabs-nav li{
    padding:1px 0; padding-left:13px;
    font-size:12px;
    color:#666;
}
#featured ul.ui-tabs-nav li span{
    font-size:11px; font-family:Verdana;
    line-height:18px;
}

#featured .ui-tabs-panel{
    width:336px; height:250px;
    background:#999; position:relative;
        overflow:hidden;
}
#featured .ui-tabs-hide{
    display:none;
}

#featured li.ui-tabs-nav-item a{/*On Hover Style*/
    display:block;
    height:60px;
    color:#333;  background:#fff;
    line-height:20px;
    outline:none;
}
#featured li.ui-tabs-nav-item a:hover{
    background:#f2f2f2;
}
#featured li.ui-tabs-selected{ /*Selected tab style*/
    background:url('https://blogger.googleusercontent.com/img/b/R29vZ2xl/AVvXsEjwZL6E0NLXMhPfYkwKXHuU7A2hVAKg-hZdlwq1ZAoNLJ2jkkCmj_2RvBxLhf35aUvL8Y_Xi_iXJX8ZPDB9xgNhKjLiQ75WV5_59Btyv1WhDeAB7S00f0BXD0JL9-90DHGJx5NVpJNunlE/s1600/selected-item.gif') top left no-repeat;
}
#featured ul.ui-tabs-nav li.ui-tabs-selected a{
    background:#ccc;
}

#featured ul.ui-tabs-nav li img{
    float:left; margin:2px 5px;
    background:#fff;
    padding:2px;
    border:1px solid #eee;
}
#featured .ui-tabs-panel .info{
    position:absolute;
    top:180px; left:0;
    height:70px; width: 400px;
    background: url('https://blogger.googleusercontent.com/img/b/R29vZ2xl/AVvXsEhYGPtXxqF6XCWdx3J75Rh92tIGYqXGTFyxA4knBy-P9f6JeulzCN6nao8c3-x5DgYflkMS2GcI1YJDC1FEvySvh5wtbPwrN5VioSrzZiTdGUeJNj8ZSNnqfhv-RZVGjeJE6T-iqMS0P7s/s1600/transparent-bg.png');
}
#featured .info h2{
    font-size:18px; font-family:Georgia, serif;
    color:#fff; padding:5px; margin:0;
    overflow:hidden;
}
#featured .info p{
    margin:0 5px;
    font-family:Verdana; font-size:11px;
    line-height:15px; color:#f0f0f0;
}
#featured .info a{
    text-decoration:none;
    color:#fff;
}
#featured .info a:hover{
    text-decoration:underline;
}

.ui-tabs-nav-item img {
width:45px;
height:45px;
}

Step 4. Now, add the following JavaScript code above the tag:


Step 5. Save the Template.

Step 6. Again, Head out to Design > Page Element > Add a Gadget > HTML JavaScript. Add the following code into the box:


These codes are little bit confusing. So, you have to edit these codes carefully. Here is the customizations:

Replace fragment-1, fragment-2, fragment-3 and fragment-4 with your post URL. There is two link in the code but you have to place same URL. For example: There is two fragment-1. So, replace these two fragment-1 with same post URL.

Red color code is for image URL. Do same as you have done for the Links above. There is two image URL. So replace Image URL with your own. For example, replace both Image URL of Link-1 with your own. Note: the both Image URL must be same.

The text with Pink color is the title of each post. So, replace all of the Pink color text with the title of your post.

The text with Green color is the summary of the post. Replace these text with short summary which must match with the titles.

Step 7. Now, Save the widget and finally you're done!

Make sure you have placed the featured post widget on the top of the "Blog Posts" as shown below:


I hope the customization is not so hard. If there is any confusing then you are free to ask question via Comment. Also, you can share you opinion and suggestion.

UPDATE: Try using this hack so the widget will appear only on homepage and it won't overlap the posts: Hiding Featured Post Widget in Post Pages in Blogger

Do you like this featured post widget? Let us see your work!

View This Article / Download>>

Friday 10 September 2010

Recent Post Widget for Blogger Using Google API

Earlier, I posted about how to add Recent Post Widget for Blogger using Feedburner. FeedBurner widget load quite faster than other, even I am using that Feedburner Recent Post widget for my blog.

Recent Post widget for blogger Using Google API

Now again, we'll learn to add the Recent Post Widget for Blogger by using Google API. This widget is much smarter than before's. I guess you'll surely love it after viewing the demo (See below).

Loading...


Thats the Recent Post Widget what you seen above. It is just like the featured content and have a stylish looks.

Lets see what have been added to this new recent post widget:

Features

- Google API code used
- Layout of featured content
- Automatic sliding and a short summary on the top
- Professional Looks
- Hover effects

In fact, this is a new Recent Post widget which is based on Google API codes.

Implementation on your Blog

To add this widget on your blog, simply follow the following steps:

Log on to your Blogger account and go to Design > Page Element > Add a Gadget > HTML/JavaScript.

Add the following code:


    Loading...


Get this Widget

Replace YOUR BLOG TITLE with your blog name and http://yourblog.com/ with your blog URL. No need to give a title to your widget because there is already a title named "Popular Post" in default.

Save the widget and view your blog how it looks like.

This widget loading power is slow as comparison to Feedburner recent post widget. However while loading this widget, it display the small text "Loading...". It enhance the widget visibility.

Have you added this widget on your blog? Let us view it!

View This Article / Download>>

Thursday 9 September 2010

Fast Loading Recent Posts Widget for Blogger

Almost all of the recent posts widget is based on the JavaScript codes. It may effects on the loading time of the blog. But now, you don't have to worry about that! I'll show you how to add fast loading recent post widget on your blog.


You may have the recent post widget provided by blogger that you can add it using your feed URL. But, that was pretty slow. In fact, FeedBurner recent post widget is 100% working. You can see the done on this blog as well (On the right sidebar).

Actually, this widget is derived from FeedBurner which is very systematical and easy to install. Lets do that! Just follow the following steps to add feedburner recent post widget on your blog:


Adding Feedburner Recent Post Widget

1. Log on to your Feedburner account (Sign up here it you don't have already).

2. Click on the Publicize button on the top navigation bar,


3. On the left sidebar, click on the BuzzBoost.


4. Now, scroll down until you see the options to customize.


Check the options as your need. You can leave the options unchecked to make it looks perfect! But, you have to choose Number of links to display on the widget. Here I have choose 10 post to display.

5. Now click Save button (Below the options).

6. You can preview the widget as show below. And copy the code they provided.


7. Log on to your Blogger account. Go to Design > Page Element > Add a Gadget > HTML/JavaScript. And paste the code that you have copied on step 5.

Click to Enlarge


8. Save the widget and you're done!

I hope you like this widget. Now, you don't have to use other JavaScript codes or Feed URL to add recent post widget. Also, you can customize this widget as you have done in step 4. After customizing, you don't need to worry about the code that you have added on your blog (FeedBurner automatically arrange it).

Share your opinion how do you like this widget?

View This Article / Download>>