Pages - Menu

Tuesday, 15 February 2011

Add Stylish Subscription Box Below Posts in Blogger

I've been asked, how to place subscription box below each blog post by one of my reader. You can increase your subscriber by placing the subscription box below every post and its best visible. Your visitors and reader can easily find subscription option. Once they come end of the post and if they liked the content then he/she feel it is important to subscribe to your blog.


So, simply I'm going to show you how can you do that one Blogger blogs. If you would like to view demo, watch subscription below this post.


Login to your Blogger account and go to Design > Edit HTML > Check Expand widget template. Find the following code:

Paste the following code just below :

Get Free Updates:
*Please click on the confirmation link sent in your Spam folder of Email*

Replace HackTutors your feed id. Save the template and your just done!

Let me know if you have done this work and show your blog.

View This Article / Download>>

Sunday, 30 January 2011

Join HackTutors on Facebook!

I would like to suggest you to join HackTutors on Facebook. Simply, click the "Like" button to unlock unlimited blogger support in the discussion board. I have made some good changes on HackTutors Facebook landing page, if you have checked it, you're free to view Welcome page. I also would like to know your suggestion about current landing page of HackTutors.

I'm offering the free blogger help on Facebook discussion board. Once you Liked the page, you'll be able to ask any question regarding blogger customizations.


I've been busy creating my new site called DigitalBunch. You can join DigitalBunch on Facebook and follow on Twitter.

I also recommend you to suggest these two blogs to your friends. Then we'll get more connections. I'm planning to create new Blogger Template. If you have any small suggestion as a pin or you have a huge suggestion as a elephant, HackTutors discussion board is the place to share. I'll appreciate all the feedback and suggestions!

If you don't know how to use HackTutors discussion board, then here is the small guide:

Go to HackTuors Facebook fan page, click "Like" button (if you haven't). Go to the "Discussion tab" and click "Create a new Topic". Then start writing about your issue.

View This Article / Download>>

Thursday, 20 January 2011

Google Page Rank Updated January 20th 2011, PR 3 for HackTutors!

Today, I'm very happy to say, Google Page Rank is updated in January 20th 2011 and HackTutors got PR 3 (PR 0 before). This is the major Page Rank Update from Google!


It had been long time, Google Page Rank was not updated. Last time, Google updated PR in April 2nd 2010. But now a years after, finally they took the action.

I hope, I'll get more plus PR in next update. And yes, don't forget to check your PR immediately using any PR checker tool. Share your happiness here via comment!

View This Article / Download>>

Friday, 31 December 2010

7 Tips for Blogging with Microsoft Office

Blogging has become one of the most popular online activities, and it has revolutionised communications media on an extensive scale. Blogs range from personal journals to the latest product updates from a major corporation. With so many tools and platforms out there for creating blog posts, it can seem challenging to find one that is the most streamlined to use. Microsoft Office Word 2007 and 2010 both contain a powerful blog post tool that takes minutes to set up. Creating posts with Word offers more options and features than typing directly into the editor in a particular blogging platform. The following are some tips to help bloggers get the most out of creating quality posts with Microsoft Word.

Preview your title

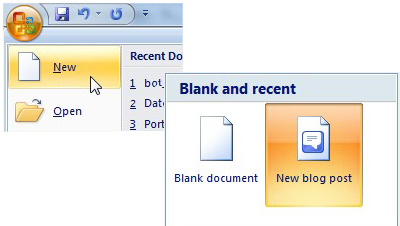
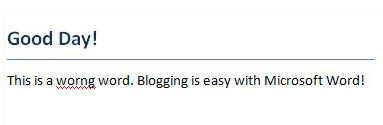
Once you select the new blog post option under the File menu options, you have a blank page with a header that prompts you to type your post title in a larger and bolder font than the rest of the post. Some bloggers write the body of their posts first and then come up with a title, and others do the opposite. Either way, use this header tool to give you a better idea of what your post title will look like on your blog next to the rest of the post.

Use editing tools

Some blogging platforms still do not have spelling and grammar check tools, which has led to many blog posts with typos and other mistakes. Posts with many mistakes have been shown to affect readers' perception of a blogger and may even influence whether they keep coming back. Using Word solves this problem, so take advantage of the famous wavy red and green lines when they appear in drafts of posts.

Clean up the code

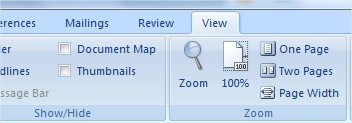
One problem with using Word for blogging in the past was with the HTML code, which quickly became cumbersome and led to distorted text when users tried to copy and paste posts. This is no longer the case with Word 2007 and 2010. Under the View tab, select the Source option after composing your post. Any text that you have bolded, placed in italics, or made different font sizes will be automatically placed in those respective HTML tags. This feature eliminates the need to insert your own HTML tags; however it is still a good idea to create posts with plain text whenever possible to avoid uploading errors that complex HTML tags can sometimes cause. One exception with this Word HTML is that it does not work well with tables, so it is advisable to avoid adding them to posts and to organise information into plain text lists instead.

Add pictures

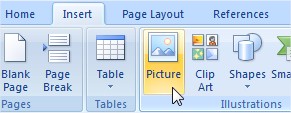
It has been shown that blog posts with pictures attract more reader interest, and Word's picture options make including pictures quite easy. Go to the Picture Options window and select the source for your pictures as well as where they will be stored. Word allows bloggers to upload images stored on their computer, shared on a site such as Photobucket, or images managed with Microsoft SharePoint.

Take screenshots
In addition to pictures, bloggers using the latest versions of Word can add screenshots to their posts as well. Windows 7 has a handy new feature called the Snipping Tool that can create screenshots of any since that can be saved and uploaded to blogs just as with other types of images. Bloggers who write tutorials or how-to posts find this option especially useful.

Make edits to existing posts

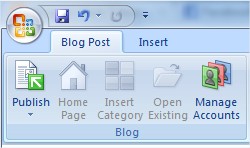
If you have published a post and like to add to it at a later time, it can easily be opened back up in Word. There is a button called Open Existing under the Blog Post tab; this lists all posts already done. Select and open the one you want to change, and then simply click the Publish button to send the revamped post back onto your blog.

Organise more than one blog


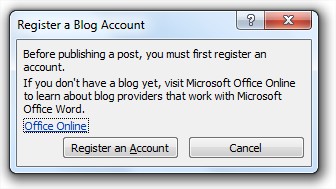
This feature is especially handy for users who may keep one blog as a personal journal and others devoted to their professional fields or other areas of interest. Microsoft Word has a set of tools to help keep track of every post in every blog. Each blog will first need to be registered using the New option. The Change option allows bloggers to switch between different blogs kept on the same blogging platform. There is also a Default Blog checkbox that causes posts to automatically be posted to a certain blog; this can be changed easily by clicking a different checkbox.

James writes about business equipment for Office Kitten.

View This Article / Download>>

Friday, 17 December 2010

Updated Thesis Blogger Template - Resolved Bugs

4 months ago, I released Thesis Blogger Template. Till now it have got 800+ downloads. There were some few bugs which have been disturbing the users and viewers as you can view comments where some of our smart reader caught the errors of the template. So, I have done some minor changes and fixed the bugs of Thesis Blogger Template. So, lets see what is updated.


Times Downloaded

Customizable Logo
Now you can directly place logo from your computer or from blogger. New option has been add to the logo layout area. You can access this by going to Design > Page Element, Click on the "Edit" link on header then you will see the option to upload your logo.

Search Bar
Search form works perfectly from now! Just you or your users have to type the keyword and hit enter. You can place the Google adsense search form if you prefer.

Google Adsense below Navbar
Now you can add Google Link Unit ads below the sub navigation bar on the top of the page. You can get more click by this feature. Make sure your link ad unit is in the site of 468 X 15px. Bigger than this ads units may overlap entire post. So, 468 X 15px link unit ads suits perfectly. Use with (#FFF) color for the text and dark grey (#CCC) for background.

Facebook Like Button
Facebook like button which consists on the top right side of each post have been updated. Now it works perfectly where there was some error on this.

Page Navigation
Page Navigation were not working smoothly before. Nut now, it works perfectly.

What's next?
If there is anything other to be updated then please let me know. You can inform me what to update via comment below.

View This Article / Download>>

Tuesday, 30 November 2010

7 most important things HTML beginners must consider

When you start learning coding and web designing in HTML, you basically begin with normal HTML markup. Laying out a page, adding colors, buttons, images etc are just the basic part you never skip to design your page.

But being a beginner you must know that no matter how basic your code is it can still have some uninvited errors. There are certain important things that you must consider to make your coding valid and capable to view in any browser window.

Let’s discuss what those 7 things are.

Make your code human readable
Because you are a HTML beginner, you are never going to use any HTML editing software like Dreamweaver, FrontPage, etc. are you? You literally start with a NOTEPAD or similar text editor and start coding but have you ever thought that you need revise your HTML markup sometime?

In the image below can you easily find the parent tag or its order?


The answer to the question is probably no if you are a beginner. Because such type of coding is just easily readable by the browser not the user. You must make it clearly readable by yourself so that you can easily find the section you are looking for in future modification.

Though the HTML tags are enclosed in “<” and “>” our brain cannot easily distinguish it from other character easily in such a huge crowd. Instead you can use CAPITAL LETTERS to rectify the HTML tag out of the web contents.


Look how the tags are distinguishable from the text contents.

Other thing you can do is make a tree order so that you can easily find the parent or child of the tag easily. This can be done by leaving some space from the right. See the example image below for more clarification.


This trick will make you easy to edit and look for the exact tag when necessary.

Using of HTML comments wisely
It is not much necessary to use HTML comments because, HTML comments are for users and browser doesn’t render it in its window. The necessity of HTML comments rises when your HTML markup goes more complex and complex. In such case using of HTML comments is necessary. As we’ve already discussed about human readability of the code in first step.


The HTML comments start with “” everything between the start and end code is not rendered in browser screen but you can easily find the it in it’s source.


Always close the tag
I understand you know this fact, but when the codes get complicated with larger contents and lots of inner divisions and blocks you’ll get confused in the middle of the path. Basically, when you view the HTML page that have unknown incomplete tags, the contents will be visible with no errors. But incase if you have added some CSS styling and tables to your web design layout you’ll probably have lots of error and fault in proper rendering in such unknown incomplete tags. Therefore ending a tag is most important thing.

Even though you are aware about it you miss to close the tag because we cannot always remember which tag was opened first and which was at last. But there is a trick (or say tips) that you can apply to have your HTML tags complete one.

Whenever you begin for a new HTML tag, close it immediately after the opening of tag.

For example, look at the sample coding below. The tag is closed instantly after it’s opening.


Then you can start filling the contents and other sub tags inside it.


Always provide alternate text for the image
This trick though won’t affect your coding, user readability or browser render-ability, it is recommended that you use alternate tags.


The above tag renders a image file named image.jpg from the specified source. But incase if you don’t have the image in specified location or mistakenly deleted the image file it will render nothing (in some browser it will show image icon or red cross icon).


Remember how important the image can be to the web page visitor. To understand your contents, S/he must know what the image was about. You must use alternet text what will  show up when browser is unable to locate your image file. This will at least give the imaginative picture of the unknown image.

”Image


Proper sequence of Headers
H1 is the first and largest header of your HTML document. If you use header (H1, H2, H3) tags you must use it in sequence. For example,

must be preceeded by

or

or

but they must not be parented under smaller header see the image below.


But this one is not right because, lower header must not parent larger header. Though this won’t show any error it is not considered as good method.

Moreover parenting headers is not recommended even it is acceptable and can be rendered properly.

Use of block and inline HTML elements
You must understand the meaning of block and inline HTML elements. Usually a HTML element can be a block or inline element. The block element is like a box that can contain other contents inside it. The inline elements doesn’t have box wrapped around it and only occupies the space that its contents have. While block element occupies as much space as it is capable of until the size or width is specified.

is literally a block element while , , , , etc are inline elements.
inside is not recommended but you can use as many as you can inside
.


Seventh? What can be the seventh one? Comment here.

View This Article / Download>>

Wednesday, 24 November 2010

Learn how to hack with Ethical Hacking Guide

Any one running a website related to Hacking gets this question asked daily "How to Hack?"Most of us are curious to learn hacking but dont know where to start,so I am writing this article for all those people who want to Learn Hacking and dont know where to start or want to Learn Hacking from Basics
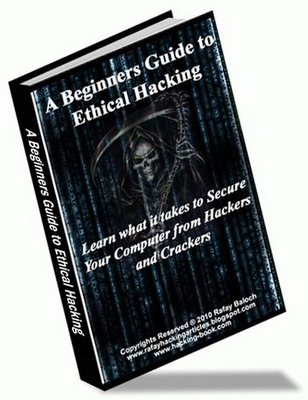
While surfing on web I came across a Book "A Beginners Guide To Ethical Hacking", The book was so simple that even a D-Grade Script kiddie can become a master Hacker

A Beginner’s Guide to Ethical Hacking


Download
What things will I learn In this book?
  • You will learn All Ethical hacking techniques and also you will learn to apply them in real world situation
  • You will start to think like hackers
  • Secure your computer from trojans, worms, Adwares, etc.
  • Amaze your friends with your newly learned tricks
  • You will be able to protect your self from future hack attacks
  • And Much more...
This book will take you from the core to the top. It will tell you how to hack, and how to defend yourself from malicious hack attacks in simple steps. It’s a great source for the beginner who want to become a Hacker. This will install a Hacker’s Mindset on you.

Special Offers for you

Along with this E-book you will get 2 bonus packs for free.
  • 1000 Hacking Tutorial : Hacking Tutorials contains1000 of the best hacking tutorials of 2010 leaked on the internet!
  • Set of Phishers : You will also get a set of 30+ phishers(Fake login page) created by Rafay Baloch.
If you think this book is something you would be interested in, you can get it here. A Beginners Guide To Ethical Hacking

View This Article / Download>>